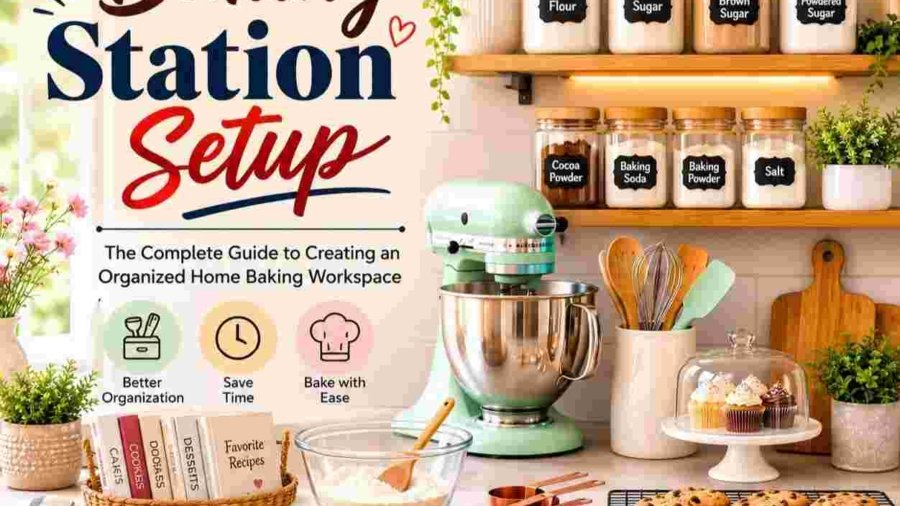
Baking Station Setup: Complete Guide to Organizing Your Home Baking Space
A well-planned baking station setup can completely transform your kitchen experience. Instead of digging through crowded cabinets for measuring cups or searching multiple drawers for a whisk, everything you need stays in one organized workspace. Whether you bake once a month or every weekend, having a dedicated baking area saves time, reduces frustration, and makes every recipe easier to follow.
Recent kitchen organization trends also support this approach. Designers are increasingly recommending dedicated prep zones and even appliance garages to keep frequently used tools accessible while reducing countertop clutter. Organizing baking supplies into functional stations is becoming one of the most practical kitchen upgrades for modern homes.
This guide covers everything you need to know—from choosing the best location to organizing ingredients, selecting essential tools, maximizing storage, and maintaining your workspace for years to come.
What Is a Baking Station?
A baking station is a dedicated workspace designed specifically for baking activities. Instead of spreading ingredients and equipment across the kitchen, everything is grouped into one organized area. Professional organizers generally recommend creating functional zones within the kitchen because they reduce unnecessary movement and make meal preparation more efficient. This same principle applies perfectly to baking, where multiple ingredients, measuring tools, and specialty equipment are used in quick succession.
An effective home baking station doesn’t require a large kitchen. Many successful setups fit inside a single cabinet, a section of countertop, or even a rolling utility cart. The key is thoughtful organization rather than square footage. Keeping flour, sugar, measuring tools, mixing bowls, and baking pans within arm’s reach minimizes interruptions and helps maintain focus while following recipes.
Table of Contents
Benefits of a Dedicated Baking Station
Save Time and Reduce Kitchen Stress
The biggest advantage of an organized baking workspace is efficiency. Every minute spent searching for ingredients interrupts your workflow and increases the chances of mistakes. Kitchen storage experts recommend grouping items by task so commonly used tools remain together. This simple organizational strategy reduces clutter while speeding up preparation.
Imagine preparing chocolate chip cookies. Instead of opening five different cabinets, you simply turn to one station where flour, baking soda, measuring cups, mixing bowls, and baking sheets are already organized. The process becomes smoother and much more enjoyable.
Another benefit is easier cleanup. Since baking supplies remain confined to one area, spills and messes are easier to manage. A clean workspace also improves food safety by reducing cross-contamination between baking ingredients and everyday cooking items.
Improve Baking Accuracy
Baking depends heavily on precise measurements. Having digital scales, measuring spoons, thermometers, and mixing bowls organized together helps maintain consistency. When tools are easily accessible, you’re less likely to substitute incorrect measurements or skip important steps.
Professional bakers rely on organized workstations because accuracy directly affects results. While home kitchens differ from commercial bakeries, the same principle applies. Organization promotes consistency, and consistency produces better baked goods.
Did You Know?
Many professional kitchens organize equipment using the “mise en place” method, meaning “everything in its place.” Home bakers can apply this same strategy for faster, cleaner baking sessions.
Who Needs a Home Baking Station?
A dedicated baking station setup isn’t just for passionate bakers. Almost anyone who enjoys homemade treats can benefit from an organized baking area.
Families often bake together during weekends and holidays. Having one central location keeps everyone involved while preventing unnecessary confusion. Children can easily locate measuring cups or cookie cutters, making baking safer and more enjoyable.
Apartment dwellers can also create highly functional stations despite limited space. A compact countertop baking station, a utility cart, or a pantry shelf can store everything needed without overwhelming a small kitchen. Creative storage solutions like stackable bins, magnetic racks, and vertical pan organizers maximize every inch.
Beginners especially benefit because organization removes much of the intimidation associated with baking. When ingredients and equipment are always in predictable locations, following recipes becomes much easier. Instead of worrying about finding supplies, new bakers can focus on learning techniques and enjoying the process.
Experienced bakers appreciate dedicated workstations because they improve efficiency during larger baking projects like birthday cakes, holiday cookies, or bread making.
Planning Your Baking Workspace
Quick Answer: Before buying containers or organizing tools, evaluate your available kitchen space and create a workflow that lets you move naturally from measuring ingredients to mixing, baking, and cooling.
A successful baking station setup starts with thoughtful planning. Many home bakers rush into buying storage bins or fancy organizers before considering how they actually bake. The result is often a beautiful-looking station that doesn’t function efficiently. Professional organizers generally recommend observing your kitchen habits for a few days before making any changes. Notice where you naturally reach for flour, where you mix ingredients, and where baked goods cool. These patterns help you design a workspace that supports your routine instead of forcing you to adapt to it.
Another important factor is proximity. Ideally, your baking station should be located near your oven and have enough countertop space for mixing bowls, measuring ingredients, and rolling dough. If possible, position your stand mixer close to an electrical outlet to avoid moving heavy appliances every time you bake. Keep ingredients within arm’s reach but separate from heat sources to preserve freshness. If your kitchen is small, even dedicating one cabinet and a two-foot section of countertop can create a highly functional baking zone.
Think about your baking frequency as well. Someone who bakes weekly may want a permanent countertop setup with frequently used appliances readily available. Occasional bakers, on the other hand, may prefer storing equipment inside cabinets while maintaining an organized system for quick access. The goal is to minimize unnecessary movement, reduce clutter, and make baking feel effortless.
Measuring Available Space
Before organizing your supplies, measure every available storage area. Record the height, width, and depth of cabinets, drawers, pantry shelves, and countertop sections. These measurements help ensure that storage containers, shelf risers, and organizers fit properly.
Don’t overlook vertical space. Empty wall areas can hold pegboards, floating shelves, magnetic knife strips for offset spatulas, or hanging rails for measuring cups and utensils. Cabinet doors can also store measuring spoons, recipe cards, or silicone baking mats using adhesive hooks.
Quick Win
Take photos of your kitchen before organizing. Comparing the “before” and “after” layouts helps identify what worked best and reveals additional improvements over time.
Creating an Efficient Workflow
Professional bakers often arrange their workspaces according to the sequence of baking tasks. You can apply the same strategy at home.
A practical workflow usually follows this order:
1. Ingredient storage
2. Measuring area
3. Mixing station
4. Preparation surface
5. Oven access
6. Cooling area
7. Storage for finished baked goods
Following this sequence minimizes unnecessary walking and keeps your baking process organized. Keeping similar items together also reduces decision fatigue. For example, store all measuring tools in one drawer instead of scattering them throughout the kitchen.
Buy According to Your Baking Style
Ask yourself:
• Do you bake every weekend?
• Do you mainly bake cookies?
• Do you enjoy bread making?
• Do you decorate cakes?
• Do you bake with children?
Your answers determine which tools deserve priority.
For example:
| Baking Style | Recommended Equipment |
|---|---|
| Cookie Baking | Cookie scoop, baking sheets, cooling racks |
| Bread Baking | Digital scale, Dutch oven, dough scraper |
| Cake Baking | Cake pans, offset spatula, turntable |
| Cupcakes | Muffin pans, piping bags, decorating tips |
| Family Baking | Large mixing bowls, stand mixer, storage containers |
Choosing the Best Location
Quick Answer: The best location for a baking station is close to your oven, has adequate countertop space, good lighting, nearby electrical outlets, and easy access to your baking ingredients.
Choosing the right location is one of the most important decisions you’ll make when designing your home baking station. A poorly positioned workspace creates unnecessary movement and frustration, while a thoughtfully located station improves efficiency every time you bake.
Natural lighting is often overlooked but incredibly valuable. Measuring flour or decorating cookies becomes much easier in a well-lit area. If natural light isn’t available, consider installing under-cabinet LED lighting to illuminate your workspace.
Ventilation also matters. Avoid storing flour, chocolate, or other sensitive ingredients directly beside ovens, dishwashers, or sunny windows where temperatures fluctuate. Consistent temperatures help preserve ingredient quality and extend shelf life.
Accessibility is another key factor. Frequently used tools like mixing bowls, measuring cups, silicone spatulas, and cooling racks should be easily reachable without climbing stools or moving heavy equipment.
Countertop vs Cabinet Setup
Many homeowners wonder whether a countertop or cabinet-based baking station setup is better. The answer depends on available space, baking frequency, and kitchen layout.
| Feature | Countertop Baking Station | Cabinet Baking Station |
|---|---|---|
| Accessibility | Excellent | Very Good |
| Appearance | Always visible | Hidden when closed |
| Best For | Frequent bakers | Small kitchens |
| Space Required | Moderate | Minimal |
| Appliance Storage | Convenient | Protected from dust |
| Maintenance | Requires frequent cleaning | Easier to keep tidy |
A countertop baking station works especially well for people who bake multiple times each week. Stand mixers, ingredient canisters, and frequently used utensils remain readily available, reducing preparation time. Decorative storage containers can even enhance your kitchen’s appearance.
Cabinet-based stations are ideal for smaller homes or minimalist kitchens. Roll-out shelves, drawer organizers, and pull-out work surfaces allow you to enjoy the benefits of an organized baking station without sacrificing valuable countertop space.
Pros of a Countertop Baking Station
• Faster preparation
• Easy access to appliances
• Attractive kitchen display
•Encourages frequent baking
Pros of a Cabinet Baking Station
• Cleaner appearance
• Better dust protection
• Ideal for apartments
• Saves countertop space
Pantry Baking Stations
If you have a walk-in pantry or a large pantry cabinet, dedicating part of it to baking can be an excellent solution. Store dry ingredients together using airtight containers with clearly printed labels. Arrange frequently used ingredients at eye level while placing seasonal baking items higher up.
Clear containers allow you to monitor ingredient levels instantly, making grocery shopping easier. Shelf risers maximize vertical storage, while baskets group related items such as cake decorating supplies or cookie cutters.
Kitchen storage experts also recommend using turntables for extracts, food coloring, and small bottles. Rotating organizers prevent items from getting lost behind larger containers.
Must-Have Baking Tools
Quick Answer: Every baking station should include accurate measuring tools, mixing bowls, quality bakeware, cooling racks, spatulas, and at least one dependable mixer.
Building your collection doesn’t require purchasing every gadget available. Instead, focus on versatile, durable tools that you’ll use repeatedly. Many home bakers prefer buying fewer high-quality items rather than replacing inexpensive tools every year.
The most essential baking tools include measuring cups, measuring spoons, a digital kitchen scale, stainless steel mixing bowls, silicone spatulas, wire whisks, rolling pins, cooling racks, baking sheets, cake pans, loaf pans, muffin tins, pastry brushes, dough scrapers, and parchment paper.
Essential Baking Tools Comparison
| Tool | Why You Need It | Best For |
|---|---|---|
| Digital Kitchen Scale | Accurate measurements | Bread, cakes, cookies |
| Stand Mixer | Hands-free mixing | Frequent bakers |
| Hand Mixer | Compact and affordable | Beginners |
| Silicone Spatula | Mixing and scraping | Every recipe |
| Cooling Rack | Even cooling | Cookies and cakes |
| Measuring Cups | Dry ingredients | Everyday baking |
| Measuring Spoons | Small ingredient accuracy | All recipes |
| Mixing Bowls | Ingredient preparation | Every baker |
Must-Have Baking Ingredients
Quick Answer: Keep your most frequently used baking ingredients together in airtight containers, label everything clearly, and rotate stock regularly to maintain freshness and avoid waste.
A well-organized baking station setup is only as effective as the ingredients it stores. Even the best collection of baking tools won’t help if you’re constantly searching for flour or discovering that your baking powder expired months ago. Organizing ingredients by frequency of use creates a smoother workflow and helps ensure every recipe starts with fresh, high-quality supplies.
The foundation of every home baking station should include essential dry ingredients such as all-purpose flour, bread flour, cake flour, granulated sugar, brown sugar, powdered sugar, baking powder, baking soda, salt, cocoa powder, vanilla extract, cornstarch, and common spices like cinnamon and nutmeg. These ingredients are used repeatedly in cookies, cakes, muffins, breads, and pastries, making them ideal candidates for permanent storage within your baking station.
Professional organizers generally recommend transferring dry ingredients from their original packaging into airtight, food-safe containers. Clear containers make it easy to monitor inventory at a glance, while stackable designs maximize cabinet and pantry space. Label each container with the ingredient name and purchase date. This simple habit prevents confusion between similar-looking ingredients such as powdered sugar and flour while helping you rotate older products first. Fresh baking ingredients produce better texture, flavor, and rising performance, making organization beneficial for both convenience and baking quality.
Essential Baking Pantry Checklist
| Ingredient | Purpose | Storage Tip |
|---|---|---|
| All-Purpose Flour | Everyday baking | Airtight container |
| Bread Flour | Yeast breads | Cool, dry place |
| Cake Flour | Soft cakes | Label clearly |
| Granulated Sugar | General sweetening | Moisture-proof container |
| Brown Sugar | Cookies and bars | Airtight with moisture saver |
| Powdered Sugar | Frosting | Keep sealed |
| Baking Powder | Leavening | Replace every 6–12 months |
| Baking Soda | Leavening | Store away from moisture |
| Cocoa Powder | Chocolate desserts | Dark cabinet |
| Vanilla Extract | Flavoring | Room temperature |
Pro Tip
Group ingredients according to how you use them. Keep leavening agents together, flavorings together, and decorating supplies in separate bins. This system reduces searching and speeds up recipe preparation.
Smart Baking Supplies Organization
Quick Answer: Organize baking supplies by category rather than size. Store similar items together so every tool has a dedicated home and can be found within seconds.
Good baking supplies organization isn’t about buying dozens of storage products. It’s about creating logical systems that make sense every time you bake. Kitchen storage experts suggest grouping tools according to how they’re used instead of where they happen to fit. For example, keep measuring cups and spoons together because they’re almost always used during the same stage of baking. Mixing bowls should stay near mixers, while decorating supplies deserve their own dedicated container or drawer.
One of the biggest mistakes beginners make is scattering baking tools throughout the kitchen. Cookie cutters end up in one drawer, piping bags in another, and cooling racks somewhere else entirely. Every baking session begins with a treasure hunt. Consolidating these items into one dedicated baking zone dramatically improves efficiency.
Transparent storage bins are especially useful because they let you see what’s inside without opening every container. Consider dividing supplies into categories such as measuring tools, mixing equipment, decorating supplies, cookie cutters, parchment paper, silicone mats, and specialty pans. Label each container clearly so every family member can return items to the correct location.
Did You Know?
Studies on home organization consistently show that clearly labeled storage systems reduce the time spent searching for household items. Even saving a few minutes each baking session adds up significantly over the course of a year.
Drawer Organization
Quick Answer: Use adjustable drawer dividers to separate measuring tools, utensils, decorating supplies, and small accessories for quick, clutter-free access.
Drawers often become catch-all storage areas, making it difficult to locate even the simplest baking tool. Transforming one drawer into a dedicated baking organizer creates one of the most noticeable improvements in your baking workspace.
Start by removing everything from the drawer and sorting similar items together. Measure the drawer before purchasing dividers or inserts. Adjustable dividers provide flexibility as your baking collection grows. Reserve one section for measuring cups and spoons, another for spatulas and whisks, and another for specialty tools like dough scrapers, pastry brushes, and cookie scoops.
Keep frequently used tools closest to the front of the drawer while seasonal or specialty items remain toward the back. Avoid stacking utensils on top of one another because this creates unnecessary clutter and slows down your workflow. Silicone liners also prevent tools from sliding around every time the drawer opens.
Drawer Organization Checklist
• Measuring cups
• Measuring spoons
• Silicone spatulas
• Wire whisks
• Dough scraper
• Pastry brush
• Cookie scoop
• Bench scraper
• Offset spatula
• Decorating tips
Quick Answer: Maximize unused wall and cabinet space by storing baking tools vertically instead of horizontally.
Vertical storage is one of the most effective solutions for small kitchen baking stations. Many kitchens have unused wall space that can easily accommodate pegboards, floating shelves, magnetic racks, or hanging rails. These additions free valuable drawer and cabinet space while keeping frequently used tools within easy reach.
Cooling racks, baking sheets, cutting boards, and muffin tins should be stored vertically whenever possible. Vertical dividers eliminate the frustration of lifting several heavy pans just to reach the one you need. Door-mounted organizers provide another excellent storage solution for measuring spoons, oven mitts, parchment paper, and silicone baking mats.
Wall-mounted hooks can also hold mixing bowls, rolling pins, and reusable shopping bags for farmers’ market ingredients. When installed thoughtfully, vertical storage keeps countertops clean while adding visual appeal to your baking station.
Storage Container Comparison
| Container Type | Best For | Pros | Cons |
|---|---|---|---|
| Glass Containers | Flour and sugar | Durable, attractive | Heavy |
| Plastic BPA-Free | Everyday ingredients | Lightweight | Can stain |
| Stainless Steel | Dry goods | Long-lasting | Not transparent |
| Stackable Acrylic | Pantry organization | Space-saving | Higher cost |
Measuring Tools Comparison
| Tool | Accuracy | Best Use |
|---|---|---|
| Measuring Cups | Good | Dry ingredients |
| Measuring Spoons | Excellent | Small quantities |
| Digital Kitchen Scale | Outstanding | Bread and pastries |
| Liquid Measuring Cup | Excellent | Liquids |
Quick Win
Choose storage containers with uniform sizes and matching labels. Consistent containers stack better, make shelves look cleaner, and simplify ingredient management.
Small Kitchen Baking Station Ideas
Quick Answer: A small kitchen can still have a highly functional baking station setup by using vertical storage, multi-purpose furniture, compact appliances, and organized cabinets.
Limited square footage doesn’t mean you have to give up on having a dedicated baking area. Many home bakers work in kitchens with less than 100 square feet and still enjoy efficient, organized workspaces. The key is making every inch count. Instead of spreading baking supplies throughout multiple cabinets, create one compact baking zone where everything is easy to reach. This approach reduces clutter, improves workflow, and makes baking feel far more enjoyable.
Space-Saving Ideas
• Install floating shelves above countertops.
• Use cabinet door organizers.
• Store baking sheets vertically.
• Choose nesting bowls and measuring cups.
• Add a rolling kitchen cart for extra storage.
• Use stackable airtight containers.
• Install under-shelf baskets.
• Hang utensils on wall rails.
Quick Win
If you have only one available cabinet, dedicate the entire cabinet to baking. Keeping every baking item together saves far more time than spreading supplies across multiple locations.
Cleaning Tips for Your Baking Station
Quick Answer: Clean after every baking session, wipe containers regularly, sanitize high-touch surfaces, and inspect ingredients monthly.
Keeping your baking station setup clean protects food quality and extends the life of your equipment. Flour dust can quickly accumulate inside drawers and around appliances, attracting moisture and pests if ignored. Wipe countertops immediately after baking using a food-safe cleaner, paying special attention to corners where dry ingredients often collect.
Storage containers should be emptied and washed periodically before refilling. This prevents residue buildup and reduces the chance of contaminating fresh ingredients with stale flour or sugar. Silicone mats and baking tools should also be cleaned thoroughly according to the manufacturer’s recommendations.
Appliances deserve regular attention as well. Stand mixers, food processors, and digital scales perform better when kept free of flour dust and sticky spills. A soft microfiber cloth works well for cleaning electronic equipment without causing damage
Cleaning Checklist
• Wipe countertops daily.
• Vacuum cabinet crumbs monthly.
• Wash storage containers before refilling.
• Sanitize drawer organizers.
• Clean appliance exteriors weekly.
• Replace worn labels.
• Check ingredient freshness monthly.
Common Baking Station Mistakes to Avoid
Quick Answer: Avoid buying unnecessary gadgets, overfilling storage areas, ignoring workflow, and failing to label ingredients.
Even well-designed baking stations can become cluttered if organization habits aren’t maintained. One of the biggest mistakes is purchasing every baking gadget available instead of focusing on versatile tools. Specialty equipment often occupies valuable storage space while being used only once or twice each year.
Another common problem is overcrowding cabinets. Every shelf should have enough empty space to remove containers easily. When storage becomes packed too tightly, supplies become difficult to access, increasing frustration and discouraging organization.
Common Mistakes
• Buying unnecessary gadgets
• Ignoring expiration dates
• Storing ingredients near heat
• Overcrowding shelves
• Forgetting labels
• Mixing cooking and baking supplies
• Leaving appliances difficult to access
Frequently Asked Questions (FAQs)
What should every baking station include?
Every baking station should include measuring tools, mixing bowls, baking pans, cooling racks, airtight ingredient containers, and commonly used baking ingredients.
Should baking ingredients be stored in airtight containers?
Yes. Airtight containers help maintain freshness, protect against moisture and pests, and make ingredients easier to identify and access.
What are the most important baking tools for beginners?
A digital kitchen scale, measuring cups and spoons, mixing bowls, silicone spatulas, baking sheets, cooling racks, and a reliable hand or stand mixer.
What's the best way to store baking sheets?
Store baking sheets vertically using a rack or divider so each pan can be removed easily without stacking.
What is the biggest mistake people make when organizing a baking station?
The most common mistake is buying too many specialty tools before creating an efficient organization system based on actual baking habits.